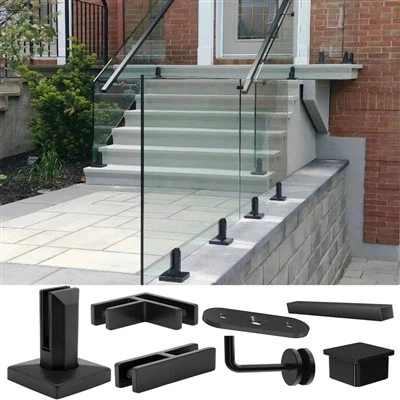
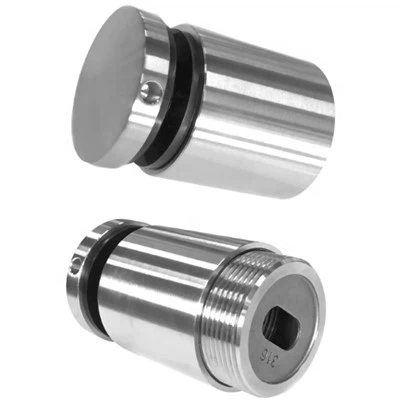
As a trusted glass standoff supplier, I've witnessed firsthand the transformative power these components bring to architectural projects. Whether you're aiming to create a contemporary office partition, a stylish shower enclosure, or an elegant glass railing, understanding the installation process of glass standoffs is crucial. In this blog, I'll guide you through each step of the installation process, providing you with the knowledge and confidence to tackle your next project.
Step 1: Planning and Preparation
Before you begin the installation, it's essential to plan and prepare thoroughly. This involves measuring the glass and the wall, selecting the appropriate standoffs, and gathering the necessary tools.
Measuring the Glass and the Wall
Accurate measurements are the foundation of a successful installation. Measure the thickness of the glass, as this will determine the length of the standoffs you need. Additionally, measure the distance between the holes in the glass and the wall to ensure a proper fit.
Selecting the Appropriate Standoffs
There are various types of glass standoffs available, each designed for specific applications. Consider factors such as the weight of the glass, the location of the installation, and the desired aesthetic when selecting standoffs. For instance, if you're installing a heavy glass panel, you'll need standoffs with a higher load capacity.
Gathering the Necessary Tools
To install glass standoffs, you'll need a few basic tools, including a drill, a tap, a screwdriver, a level, and a measuring tape. Make sure you have all the tools on hand before you start the installation to avoid any delays.
Step 2: Marking the Wall
Once you have all the necessary tools and materials, it's time to mark the wall for the standoff installation. Use a measuring tape and a level to ensure the marks are straight and evenly spaced.
Determining the Placement
The placement of the standoffs will depend on the size and shape of the glass panel. As a general rule, standoffs should be placed approximately every 12 to 18 inches along the edge of the glass. However, you may need to adjust the spacing based on the weight and size of the glass.
Marking the Holes
Using a pencil or a marker, mark the locations where you'll be drilling the holes for the standoffs. Make sure the marks are clear and visible, as they will guide you during the drilling process.
Step 3: Drilling the Holes
Drilling the holes is a critical step in the installation process. It's important to use the correct drill bit and to drill the holes at the right depth to ensure a secure fit.
Selecting the Drill Bit
The size of the drill bit you need will depend on the size of the standoff bolts. Refer to the manufacturer's instructions to determine the appropriate drill bit size.
Drilling the Holes
Carefully drill the holes at the marked locations on the wall. Make sure the holes are straight and perpendicular to the wall. If you're drilling into a hard surface, such as concrete or brick, you may need to use a hammer drill to make the process easier.
Cleaning the Holes
Once you've drilled the holes, use a brush or a vacuum cleaner to remove any debris or dust from the holes. This will ensure a clean and secure fit for the standoff bolts.
Step 4: Installing the Wall Anchors
After drilling the holes, it's time to install the wall anchors. Wall anchors provide a secure base for the standoff bolts and help distribute the weight of the glass evenly.
Selecting the Wall Anchors
The type of wall anchors you need will depend on the type of wall you're working with. For drywall, plastic wall anchors are typically sufficient. For concrete or brick walls, you'll need to use metal wall anchors.
Installing the Wall Anchors
Insert the wall anchors into the drilled holes and tap them gently with a hammer until they are flush with the wall. Make sure the anchors are securely in place before proceeding to the next step.
Step 5: Installing the Standoff Bolts
With the wall anchors in place, it's time to install the standoff bolts. The standoff bolts will hold the glass panel in place and provide support.
Inserting the Standoff Bolts
Insert the standoff bolts into the wall anchors and tighten them using a screwdriver or a wrench. Make sure the bolts are tightened securely, but be careful not to over-tighten them, as this could damage the wall or the standoffs.
Checking the Alignment
Once the standoff bolts are installed, use a level to check the alignment of the bolts. Make sure they are all at the same height and that they are straight. If necessary, adjust the bolts to ensure a proper fit.


Step 6: Preparing the Glass
Before installing the glass panel, you'll need to prepare it by drilling holes for the standoffs. This step requires precision and careful attention to detail.
Measuring and Marking the Glass
Measure and mark the locations where you'll be drilling the holes for the standoffs on the glass panel. Make sure the marks are accurate and aligned with the standoff bolts on the wall.
Drilling the Holes in the Glass
Use a diamond drill bit to drill the holes in the glass. Diamond drill bits are specifically designed for drilling through glass and will provide a clean and precise hole. Drill the holes slowly and steadily to avoid cracking the glass.
Cleaning the Glass
Once the holes are drilled, clean the glass panel thoroughly to remove any debris or dust. This will ensure a clear and smooth surface for the installation.
Step 7: Installing the Glass Panel
With the standoff bolts in place and the glass panel prepared, it's time to install the glass panel. This step requires at least two people to ensure the glass is handled safely and correctly.
Lifting the Glass Panel
Carefully lift the glass panel and position it over the standoff bolts. Make sure the holes in the glass align with the standoff bolts on the wall.
Inserting the Standoff Caps
Once the glass panel is in place, insert the standoff caps onto the standoff bolts. The standoff caps will hold the glass panel in place and provide a finished look.
Tightening the Standoff Caps
Use a screwdriver or a wrench to tighten the standoff caps. Make sure the caps are tightened securely, but be careful not to over-tighten them, as this could damage the glass or the standoffs.
Step 8: Final Checks and Adjustments
After installing the glass panel, it's important to perform a final check to ensure everything is in place and functioning correctly.
Checking the Alignment
Use a level to check the alignment of the glass panel. Make sure it is straight and level. If necessary, adjust the standoff caps or the standoff bolts to ensure a proper fit.
Testing the Stability
Gently shake the glass panel to test its stability. If the glass panel moves or wobbles, tighten the standoff caps or the standoff bolts further.
Cleaning the Glass
Once you're satisfied with the installation, clean the glass panel thoroughly to remove any fingerprints or smudges. This will give the glass a clear and professional look.
Conclusion
Installing glass standoffs may seem like a daunting task, but with the right tools, materials, and knowledge, it can be a straightforward process. By following the steps outlined in this blog, you can ensure a successful installation and create a beautiful and functional glass feature in your space.
If you're interested in purchasing high-quality glass standoffs for your next project, contact us today. Our team of experts is ready to assist you in selecting the right standoffs for your needs and providing you with the support you need throughout the installation process.
References
- "Glass Installation Guide." Glass Association of North America.
- "Standoff Hardware Installation Instructions." [Manufacturer's Name].