Hey there! I'm here to share with you a step - by - step guide on how to install a glass clamp on a glass table. As a glass clamp supplier, I've seen firsthand how these little guys can make a huge difference in the look and functionality of your glass table.
Why Use Glass Clamps?
First things first, let's talk about why you'd want to use glass clamps. Glass clamps are not only practical but also add a stylish touch to your glass table. They hold the glass firmly in place, preventing it from shifting or moving around. Whether you're using a glass table for dining, as a desk, or just as a decorative piece, glass clamps ensure stability and safety.
Types of Glass Clamps
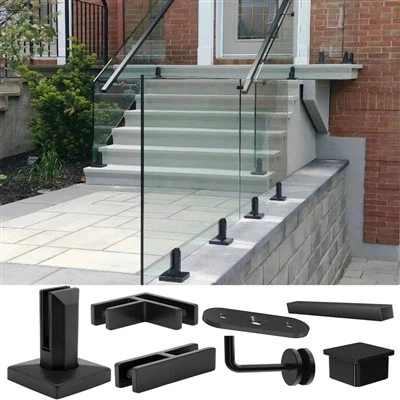
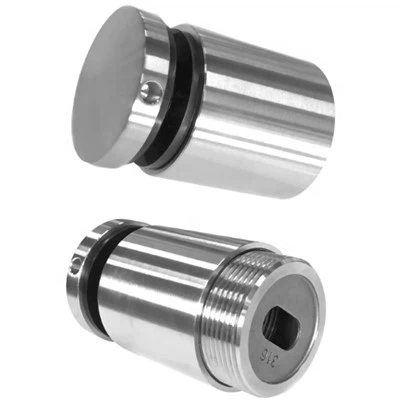
There are different types of glass clamps available in the market. We offer Glass Balustrade Brackets, which are great for providing support and a sleek look. Stainless Steel Glass Clamps are another popular choice. They're durable, resistant to corrosion, and look super cool. And then there are Glass Bracket Holders, which are designed to securely hold the glass in position.
Tools You'll Need
Before you start the installation process, gather the necessary tools. You'll need a drill, drill bits (the right size for your glass clamps), a screwdriver (either flat - head or Phillips, depending on the type of screws your clamps use), a measuring tape, a level, and a marker. Make sure your tools are in good working condition to ensure a smooth installation.
Step 1: Measure and Mark
The first step is to measure and mark the spots where you'll install the glass clamps. Use your measuring tape to determine the correct spacing between the clamps. This will depend on the size and weight of your glass table. Generally, you want to space the clamps evenly to distribute the weight of the glass evenly.
Once you've measured the spacing, use a marker to mark the spots on the table surface where you'll drill the holes. Make sure your marks are straight and accurate. You can use a level to double - check that your marks are horizontal or vertical, depending on the orientation of your clamps.
Step 2: Drill the Holes
Now it's time to drill the holes. This is a crucial step, so take your time and be careful. Select the appropriate drill bit for your glass clamps. If you're not sure which drill bit to use, refer to the instructions that came with your clamps.
Start by drilling a small pilot hole at each marked spot. This will help guide the larger drill bit and prevent the glass from cracking. Once you've drilled the pilot holes, switch to the larger drill bit and carefully drill the full - sized holes. Apply gentle pressure and keep the drill straight to avoid any damage to the glass.
Step 3: Clean the Holes
After drilling the holes, use a clean cloth to remove any glass dust or debris from the holes. This will ensure a proper fit for the screws and prevent any scratching or damage to the clamps. You can also use a small brush to get into the corners of the holes and remove any stubborn debris.
Step 4: Install the Glass Clamps
Now that your holes are clean, it's time to install the glass clamps. Place the clamps over the holes and align them with the markings on the table. Insert the screws through the holes in the clamps and into the holes in the table. Use a screwdriver to tighten the screws, but don't over - tighten them. Over - tightening can cause the glass to crack or the clamps to become misaligned.
As you're tightening the screws, check to make sure the clamps are level and straight. You can use a level to double - check the alignment. If you notice any misalignment, loosen the screws slightly and adjust the clamps until they're straight.
Step 5: Place the Glass on the Clamps
Once the clamps are installed, carefully place the glass on the clamps. Make sure the glass is centered and aligned with the clamps. You may need to adjust the position of the glass slightly to get a perfect fit.


If your glass table has a beveled edge, make sure the beveled edge is facing the correct direction. Some clamps are designed to work specifically with beveled glass, so pay attention to the orientation of the glass.
Step 6: Final Checks
After placing the glass on the clamps, do a final check. Gently shake the table to see if the glass is secure. If the glass moves or wobbles, check the tightness of the screws and the alignment of the clamps. Tighten any loose screws and adjust the clamps as needed.
Also, check the level of the table surface. If the table is not level, you may need to adjust the position of the clamps or use shims to level the table.
Troubleshooting
Sometimes, things don't go as smoothly as planned. If you encounter any problems during the installation process, here are some common issues and how to solve them:
- Cracked Glass: If the glass cracks while drilling the holes, stop immediately. You may need to replace the glass. To prevent cracking in the future, make sure you're using the correct drill bit and applying gentle pressure when drilling.
- Loose Clamps: If the clamps are loose, check the tightness of the screws. You may need to tighten them further, but be careful not to over - tighten. If the screws are stripped, you may need to replace them.
- Misaligned Clamps: If the clamps are misaligned, loosen the screws and adjust the position of the clamps. Use a level to ensure they're straight and then tighten the screws again.
Conclusion
Installing a glass clamp on a glass table is a relatively simple process if you follow the steps carefully. With the right tools and a little patience, you can give your glass table a more secure and stylish look.
If you're interested in purchasing high - quality glass clamps for your project, we're here to help. We offer a wide range of glass clamps to suit different needs and styles. Whether you're a DIY enthusiast or a professional contractor, we've got you covered. Reach out to us to discuss your requirements and start your procurement process.
References
- General knowledge from years of experience as a glass clamp supplier.
- Manufacturer's instructions for glass clamps.